


3. Image standards
© Elizabeth Hunter, CC BY 4.0 https://doi.org/10.11647/OBP.0138.03
The most important aspect of digitising a manuscript is to make sure that the text is in focus and legible. There are, however, other factors you should consider to ensure your images are as pleasing to the eye as possible. If you are new to photography, this is a skill you will need to develop. For some people it will come naturally; for others it will take a little more time to learn. To help improve your judgement of what makes a good photograph, we have included several examples of digitised items; some of them are perfect, whilst others show varying levels of inadequacy. Look closely at the examples to understand what constitutes a high-quality image.
When you are awarded your grant, you will need to send sample images to the EAP curator for approval. It is important to send your samples as soon as you start digitising. The temptation can be to digitise many items before you decide to submit them. The risk in doing this is that they may not meet the appropriate standards, and this can result in low morale if you are told that they are not quite right. The material you are digitising is fragile and vulnerable and you only want to handle it once, so getting it right first time is important. It is wise to spend time familiarising yourself with the equipment and assessing the quality of the photographs you are producing. Compare your photographs with the examples provided in this chapter; this should help you decide whether you are on the right track.
Lighting
It is a good idea, if possible, to replicate the controlled conditions of a studio, by blocking out light from windows and using the light of your studio flash to illuminate the objects being photographed.
The output from the flash will generally overpower ambient light, but if you have strong sunlight, then it can affect your camera exposure, and you may find that your images are brighter on one side than the other.
If it is not possible to photograph inside, then a cloudy day will give a nice soft light. If you have strong sunlight, then a white sheet placed above your working area will make the sunshine much more diffused.
Your lights need to illuminate the object and not cause problems of their own — for example, flare or unevenness — so you should ensure the lights are placed at equal distance from the items being photographed, and preferably at an angle of 45 degrees.
The larger the softbox (a softbox is a large fabric-covered frame that is placed over the bulb to produce soft and even lighting) or the umbrella you use with your lights, the more diffused, soft and even the lighting will be.
Digitising to the highest standard is essential. It is highly possible that there will never be a second chance to access these endangered materials.
Jian Xu, EAP012, EAP081, EAP143, EAP217, EAP460 and EAP550, China
The photographing of the manuscripts used only natural light and this presented a challenge on overcast or rainy days. On such days, the team had to wait until lighting conditions improved or even had to cancel the appointments with the manuscript owners. This not only delayed the work but also wasted time of the manuscripts’ owners who are busy farmers.
Hao Phan, EAP698, Vietnam
Most of the times our work depended on the climate of Assam. Once the rainy season started we had to stop our work as the photographing of the manuscripts had to be done outdoors to get proper light. Indoor photography was generally impossible because the mud houses of most of the owners were poorly lit. Also the incessant rain made it difficult to move around. The rainy season generally runs for about half the year.
Stephen Morey and Poppy Gogoi, EAP373, Assam
The museum was a long shed with windows along the whole length, so we blacked out the windows of a railway coach. To do this we had to scour the local shops for black cloth!
Tim Procter, EAP626, Sierra Leone
Colour checkers and white balance
You should ensure the computer and cameras are calibrated and that the cameras are ‘white balanced’ so that what is viewed on your computer screen is an accurate example of what has been captured.
You should begin your day’s work by photographing a control shot with a colour checker target on a plain white background.
Comparing these control shot images will highlight any shift in colour balance and exposure, and the plain white background will show up any dust or marks on the camera sensor.
You should always include an accurate colour checker (including measurement scale) in each of your images.
Background
It is advisable to use a neutral grey or black background, preferably nothing too shiny or with too much texture, something like thick paper, under the items being photographed. This will provide a clean, uniform surface, and give a tidy look to the images.
Framing
Aim to fill the frame with the item as much as possible, and put the greyscale and measurement scale in the blank area over to one side of the frame. You don’t want to lose valuable image space by putting the scales in the wrong place.
It is a good idea to use a spirit level to get the camera parallel to the item being photographed, and try to make the item as flat and level as possible, by propping up any low parts with Plastazote and holding down any higher parts with a Perspex pointer.
When you are photographing a book that has many pages, make sure that the distance between the page being photographed and the camera remains the same, so the images are all the same size and all remain in focus as you work your way through the book. This will mean measuring the distance when you begin photographing and keeping a note of it, then remeasuring and readjusting the camera position every 20 pages or so.
This does depend on how thick the pages are; you may find you only need to move the camera closer, for instance, every 50 pages if the paper is thin. This is something that you will need to judge.
The measurement scale and the greyscale should remain level with the page being photographed, which will mean propping them up on pieces of foam or cardboard when you are at the beginning of your book and reducing these as you progress through the book.
Photographing negatives
If you need to digitise glass or gelatine negatives, then one of the best ways is by using a copy stand with a camera attached, and a lightbox below it (see Figure 26).
The negative is placed onto the lightbox and masked with black paper so that only the negative is illuminated. This will need a slow shutter speed, maybe around 1 second, because the total illumination is coming from the lightbox through the negative.
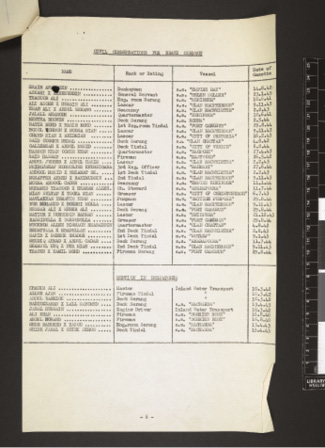
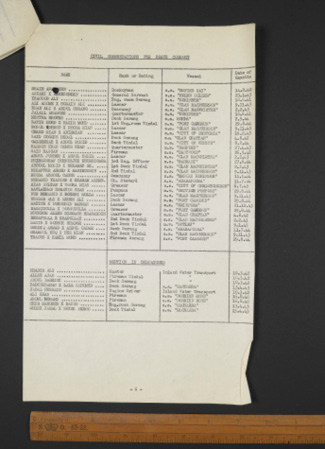
Table 3. EAP standards for digital material
|
From originals |
|
|
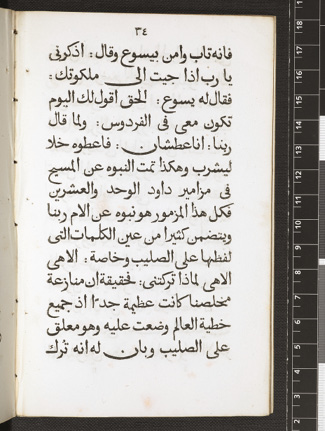
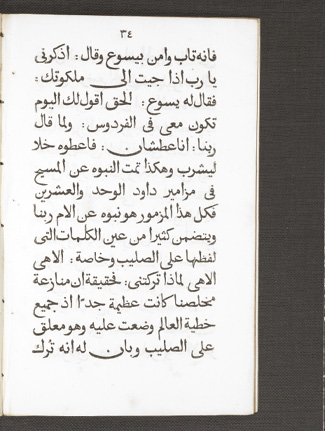
Black-and-white photographs |
8-bit greyscale, resolution dependant on size of original, likely to be in the range 300–1200 ppi. It may be appropriate to capture as 24-bit RGB depending on image tone. |
|
Colour photographs |
24-bit RGB, resolution dependant on size of original likely to be in the range 300–1200 ppi. |
|
Slides or small negatives |
8-bit greyscale or 24-bit RGB, effective resolution of 300 ppi relative to the size of the original. |
|
Printed texts |
8-bit greyscale, 400 ppi. |
|
Printed texts with half-tone, and other black-and-white illustrations |
8-bit greyscale, 400 ppi, 24-bit RGB may be considered depending on characteristic of material. |
|
Printed texts with colour illustrations |
24-bit RGB, 400 ppi. |
|
Manuscripts, maps and other materials |
300 ppi, 8-bit greyscale or 24-bit RGB. Spatial resolution can be adjusted to 400 ppi and greater where significant elements to be captured are less than 1.5mm. |
The EAP checking process
When you begin digitising, you must submit sample images to EAP for checking and approval. Do not begin digitising the archive until any comments have been addressed and approval is received.
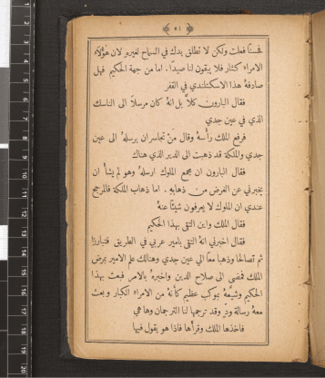
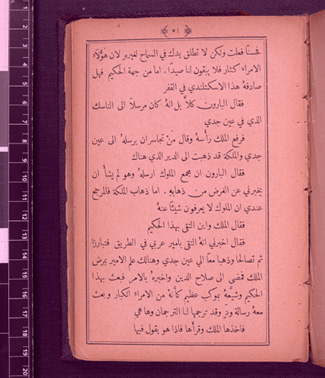
Examples of good and bad images
Below are some examples pairing images that meet EAP guidelines and those that do not. Look at them carefully to notice the difference in each case.
|
|
|
|
✓ The flare has been reduced by using a light tent or bouncing the light from the ceiling. |
✗ The surface has flare due to the light hitting it. |
|
|
|
|
✗ There is too much border around the item which has resulted in a lot of wastage of the frame. |
|
|
|
|
|
✓ The whole item is in the frame. |
✗ The edges of the item are not visible. |


|
|
|
|
✓ The item fills the frame, and the scale is placed neatly on the side. |
✗ The item is too small in the frame, and the scale and colour checker take up too much space. |
|
|
|
|
✓ The camera has been white balanced so the item appears with the correct colour. |
✗ The camera has not been white balanced, so the item appears with the wrong colour. |


|
|
|
|
✓ The item is isolated on a black background and fills the frame. |
✗ The item is on the wrong colour background, and is too small in the frame. |

Figure 29. Preventing light appearing in an image. Using a thin sheet of foam, attached to the camera lens, will prevent the light source appearing in the image (in this case the lamp). Photos © Elizabeth Hunter, CC BY 4.0.
Techniques to prevent common problems
Sometimes the reflection from the lamps and light sources can appear in the photograph. To avoid this, you can place black card or Plastazote over the lens as shown below.
When you are digitising a bound volume, it is important to support the lowest side of the book but, at the same time, ensure that any supports are not visible. Good materials to use are Plastazote, foam or black card. Make sure that you have a supply of these materials when you digitise.
The same principles are true when you photograph an insert from a book. It is important that it rests flat and that the materials do not interfere with the image. Look at the earlier examples and see how the good shots were achieved.
The following images show some other considerations when digitising a book:
|
|
|
|
✓ |
✗ If there is a shadow in the gutter of the book then turn the book 90 degrees so that the lights are opposite the shadow, thereby eliminating it. If the page needs to be held down, use the end of a piece of Perspex or any other clear hard plastic. |
|
|
|
|
✓ If it is necessary, prop up one side of the book, then use a piece of the same black paper that you use for the background directly under the propped-up side of the book. |
✗ Do not use other publications to prop up one side of the book. |
|
|
|
|
✓ |
✗ Do not use your fingers to flatten pages. |
|
|
|
|
✓ If you need to use glass and find you have reflections, then use a piece of black paper and cut a hole to fit the lens through. Lowering the height of the lights will also reduce reflections. |
✗ Ensure that there is no reflection from your light source. Refer to Figure 29 to see how this can be done. |
|
|
|
|
✓ |
✗ If a publication contains a folded insert, ensure it rests flat. |
|
|
|
|
✓ Try putting small pieces of Plastazote under the edges of a book to make the double opening level, and if necessary hold down any parts that are lifting up with a Perspex strip. Don’t use a wide-angle lens because this causes the image to look distorted. |
✗ Make sure the pages are flat. Use a Perspex pointer if needed to gently press on the edge of the page. |

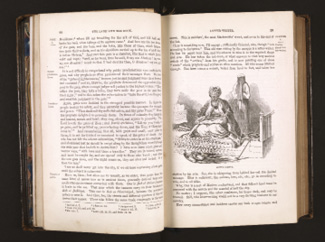
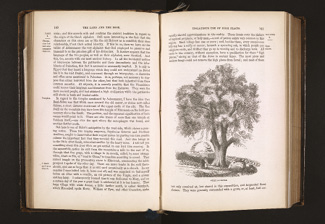
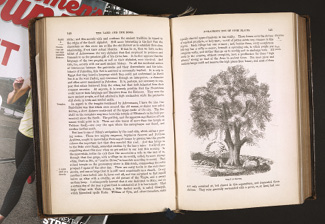
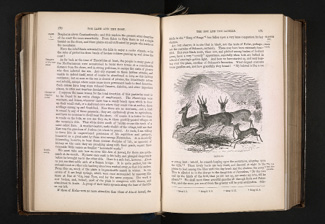
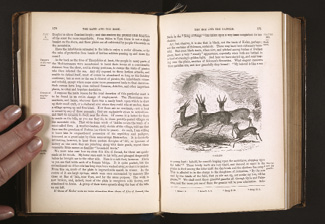
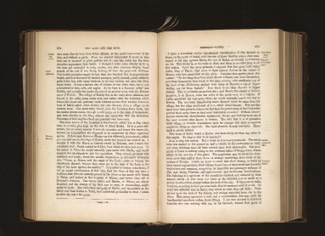
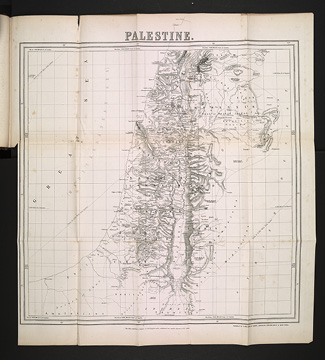
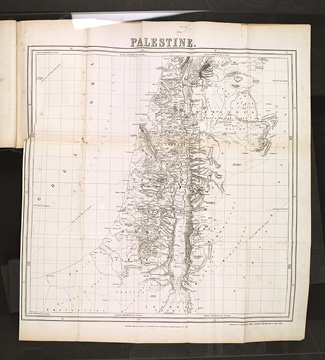
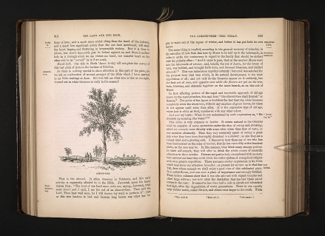
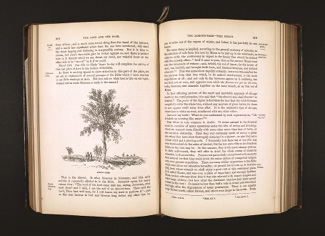
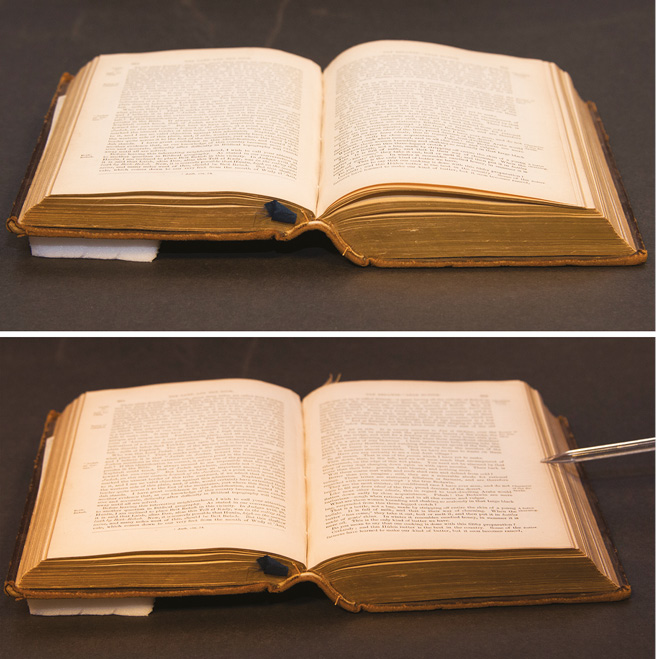
Figure 30. Building up foam beneath a bound book with a tight spine. This means it rests flat, with the object page parallel to the camera. The use of a Perspex pointer ensures that the page does not move during the taking of the photograph. Photos © Elizabeth Hunter, CC BY 4.0.
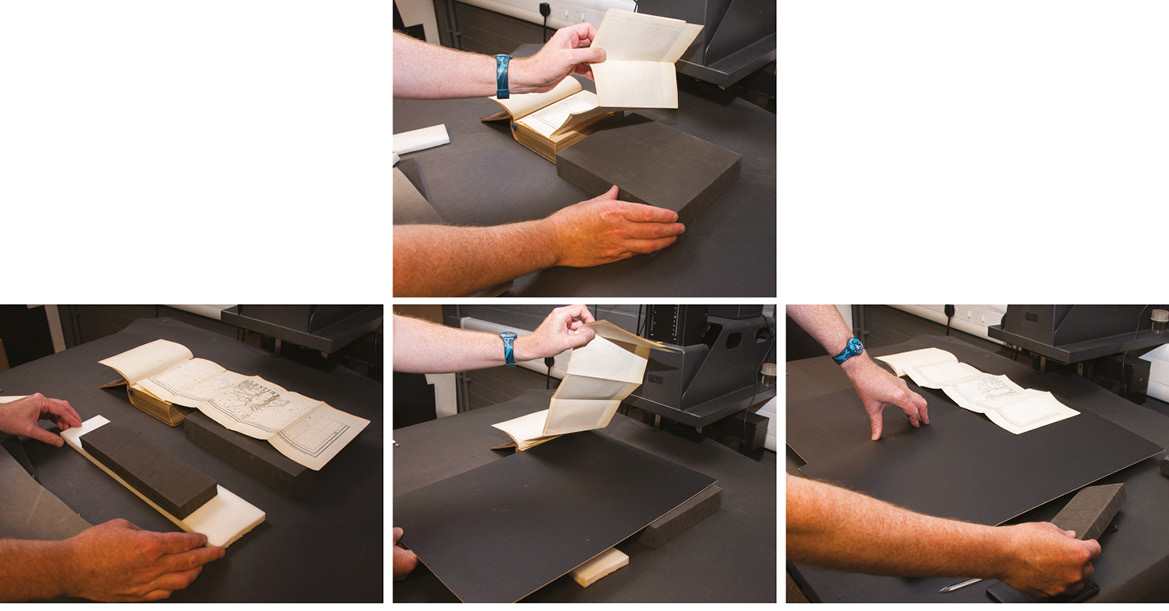
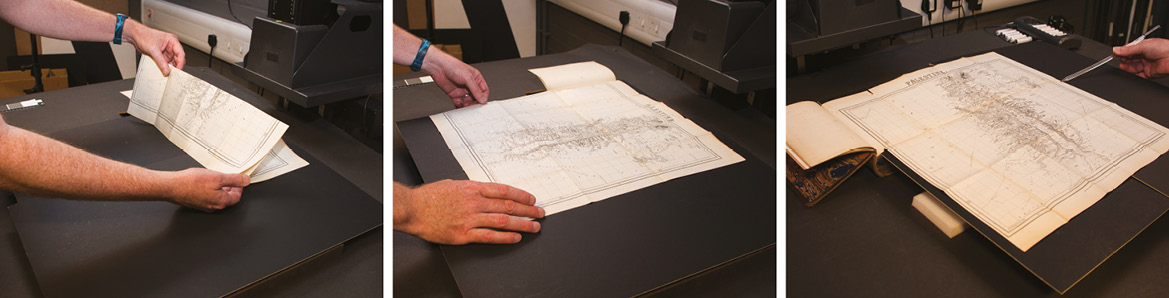
Figure 31. Step-by-step method for opening and supporting a folded map that is included within a bound book. This sequence shows the need for a careful and systematic approach. Photos © Elizabeth Hunter, CC BY 4.0.

