23. Editing Workflow in Adobe Premiere Pro
© 2021 Darren R. Reid and Brett Sanders, CC BY-NC 4.0 https://doi.org/10.11647/OBP.0255.23
There are many different pieces of editing software available, ranging from powerful but free (or low-cost) apps, to more versatile packages which bring with them a more significant financial outlay. For the purposes of this chapter, we have chosen to provide a walk-through of Adobe Premiere Pro. It is powerful and an industry standard. Though it is not free, it is available as part of a competitively priced monthly subscription which should place it within the means of many readers. Alternative software packages are available, many at a lower cost with a similar set of features and workflow as that employed by Adobe’s software. Even if you choose to utilise a different software package, the basic principles explained in this walk-through may still be useful.
In this chapter, we will go step-by-step through the editing process, from opening the software to exporting your first completed film. By the end of the chapter and its associated video lesson, you should have enough knowledge to use Premiere Pro successfully to competently edit your projects. This walk-through cannot teach you everything about this very powerful and versatile software package, but it will explain the fundamentals upon which you can continue to build. Before beginning this walk-through, ensure that you have the following resources:
- At least two separate video clips, such as a multi-camera interview or different pieces of environmental footage. Still images, such as photographs or illustrations, can also be used. If you have been completing the tasks assigned during each of the video lessons, you should have collected ample material by this point.
- At least one audio file not already associated with a video clip. This can include music, sound effects, or audio captured separately from a video file (such as the audio recorded by a lavaliere microphone during an interview or a commentary track).
- A folder on your device that contains all the relevant audio-visual files. This is not essential, but storing all your material in one location will simplify the editing process.
Step One: How to Start a New Project
- Open the Adobe Premiere Software.
- Select ‘New Project’.
- In the new window that appears, you will be able to give your project a name. Set the Display Format to ‘Timecode’. Set the Audio Format to ‘Audio Samples’. Set the Capture Format to ‘HDV’.
- Click ‘OK’ to create your project.

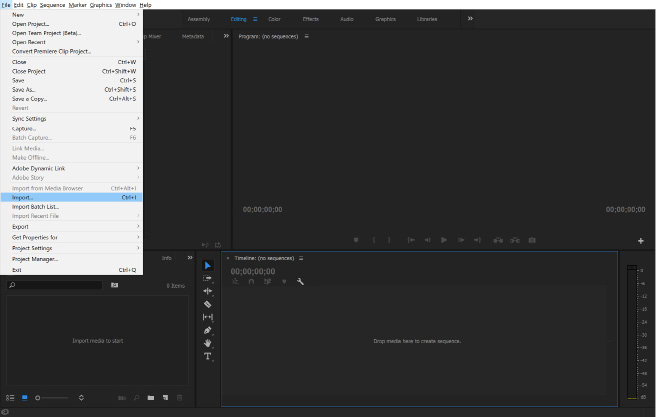
Fig. 61. Select “New Project” to begin.
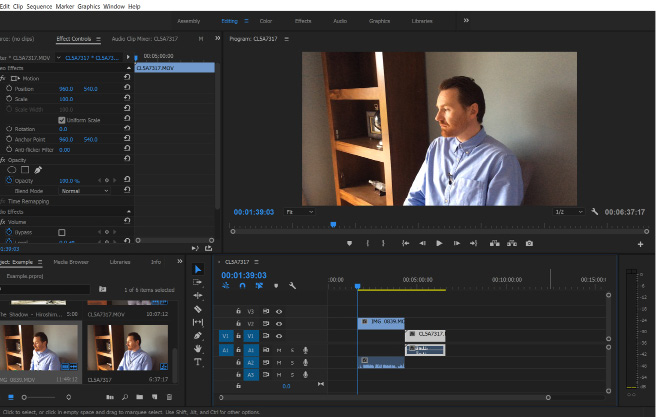
Step Two: Get to Know the Premiere Workspace
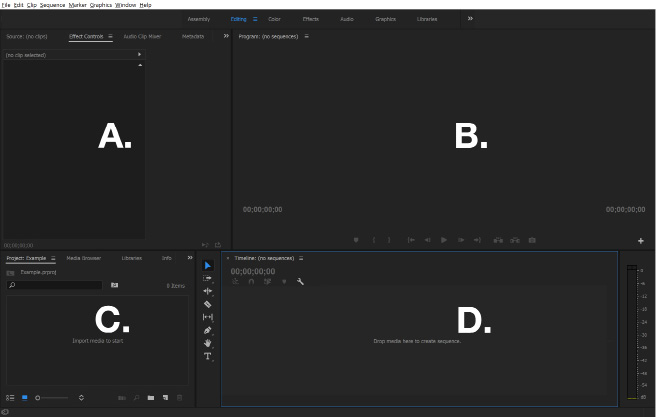
Fig. 62. The four main working areas in Premiere Pro.
- The workspace in Premiere is generally divided into four sections:
- Effect Control Window.
- Preview Window.
- Media Bin.
- Timeline.
- The Timeline is the space where audio and video clips are placed, manipulated, and edited together. The raw materials for your project (unedited audio and video) are stored in the Media Bin. The Preview Window will allow you to watch (preview) your project. The Effect Control Window allows you to manipulate aspects of your clips, such as their transparency level or position on the screen.
Step Three: Import Video and Audio Clips into your Project
- Go to ‘File’. Select ‘Import’.
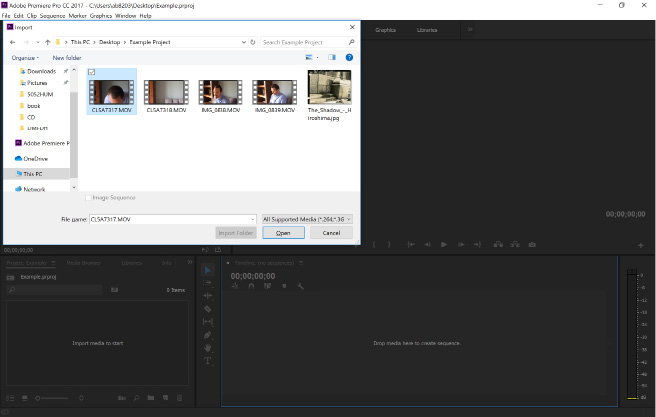
- Navigate to the folder where you have stored your raw audio and visual files and select the file(s) you wish to import. Click ‘OK’.
- Your chosen file(s) will now appear in the Media Bin.
- You are now ready to start editing your clips.
Step Four: Move Clips into your Timeline
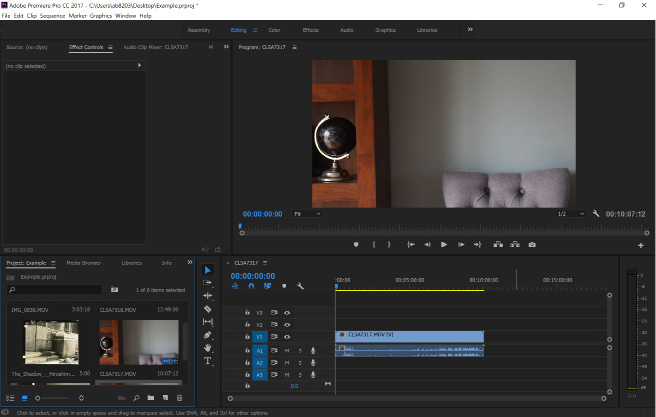
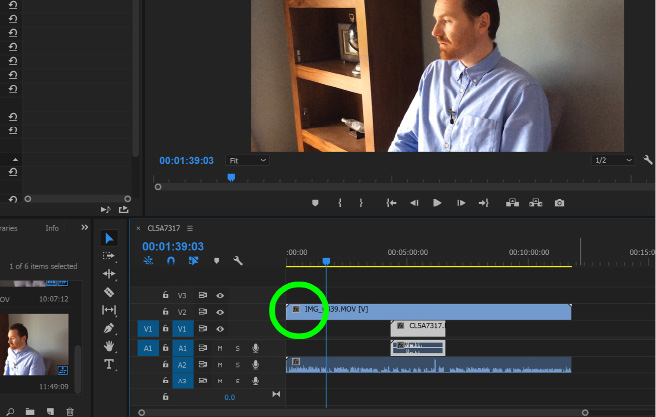
Fig. 65. Moving footage from your project folder into your timeline.
- Select the clip you wish to import into your film from the Media Bin.
- Click the file and drag it into the Timeline window.
- The clip will now appear in the Timeline window in its full, unedited form. Note that your Preview Window will now display a still image from the start of this video file.
- At the top of the Timeline is a blue arrow. This arrow is connected to a long, thin blue line, which cuts vertically through your Timeline. It should be located at the time stamp 00:00.
- Click the blue arrow and drag it along your Timeline.
- See how the Preview Window changes as you begin scanning through your footage.
- Press the space bar. This will begin playback of whatever is in your Timeline. Note how the preview begins wherever the blue bar is located. Press the space bar again to stop the video from playing.
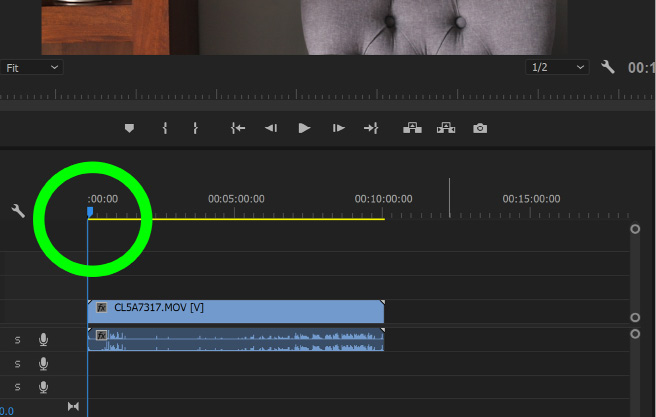
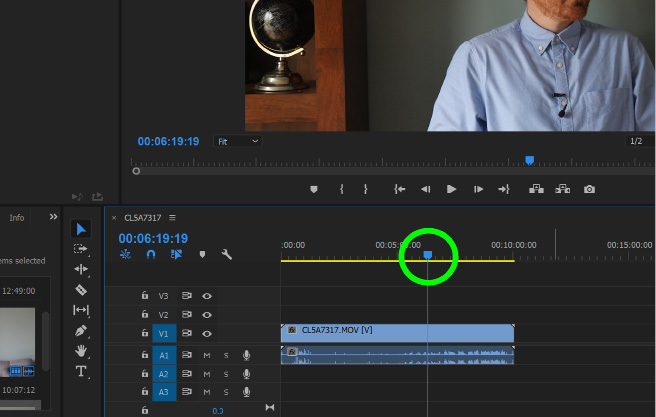
Figs. 66–67 Moving this blue bar will allow you to scroll through your project.
Step Five: Shorten a Clip
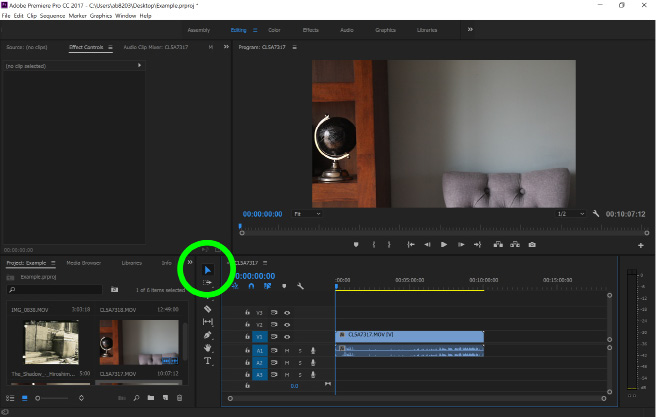
Fig. 68. The arrow cursor will allow you to easily select different parts of your project and begin manipulating them.
- Select the arrow-shaped cursor from the toolbar.
- Move your cursor to the end of the clip. Note how, as the cursor hovers over the end of the clip, it changes into a red bar with an arrow, which should face towards the left (see Figure 69).
- Click the end of the clip. Drag your mouse to the left. Note how the clip begins to shrink as you drag your mouse.
- Move your cursor over the grey bar located at the bottom of your Timeline. At the end of this bar is a small, circular handle. Click this and drag it to the right or to the left. Note how the Timeline zooms in and out, allowing you to judge timing more accurately. Repeat step three until you shorten your clip to the desired length. Zoom in and out of the time as required to ensure that you have shortened it to the correct timestamp.
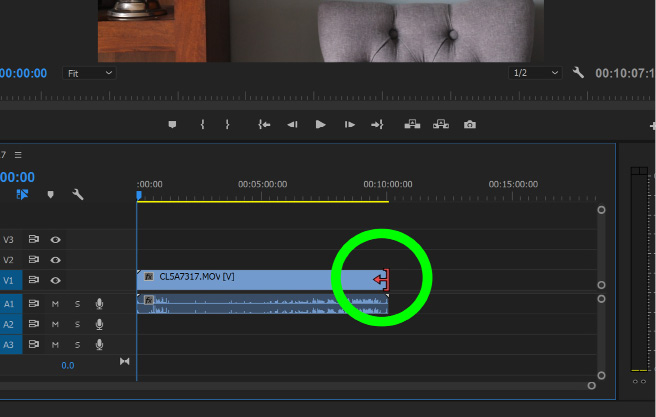
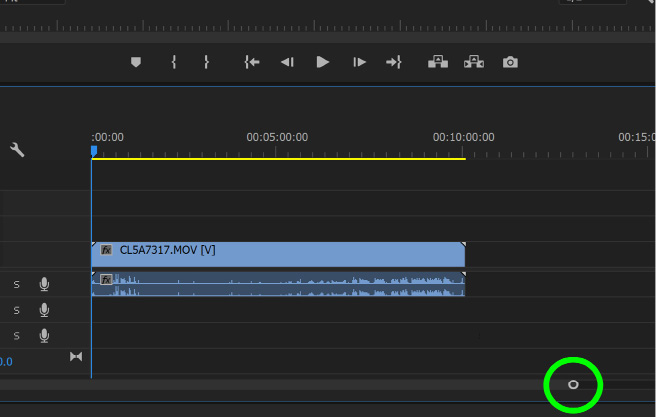
Fig. 70. Clicking and dragging this handle will allow you to zoom in and zoom out of your project.
Step Six: Moving Clips Around the Timeline
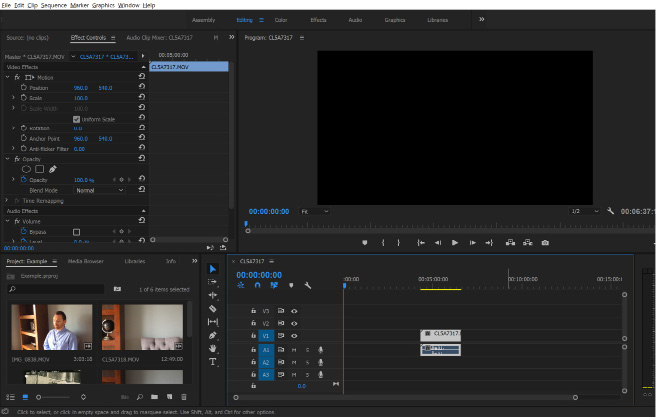
Fig. 71. Click on individual components within your timeline to rearrange them.
- Select the clip you wish to move — click and hold with your left mouse button.
- As you hold the left mouse button down, drag the clip left or right. Move it to the desired location in your Timeline.
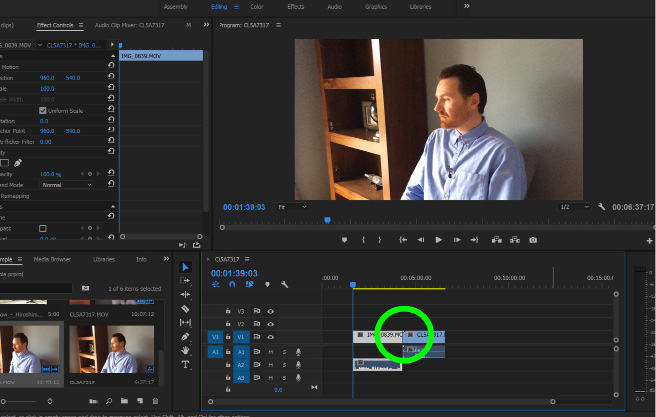
Step Seven: Cutting Between Clips
- Select a new clip from the Media Bin. Drag it into your Timeline (see step four). Drag the clip onto a different layer from that of the first clip. This will prevent you from accidentally overwriting clips you have already edited. Note how clips can exist concurrently in the timeline, if they are placed on separate layers. Clips are typically composed of a video and an audio element. The video element will appear in the top half of the Timeline. The audio element will appear in the bottom half of the Timeline. When importing a new clip to your Timeline, ensure that neither the audio nor the video elements overwrite any of your previously imported work. You can change the layer on which a clip sits by clicking and dragging it up or down on the timeline.
- Reduce the new clip to the desired length, as per the instructions in step five. You can shorten a clip by hovering your cursor over its start and/or its end point. This will allow you to remove unwanted material that appears from the first or the second half of the clip.
- Once you have shortened the new clip to its desired length, click and drag it to the desired location on your Timeline.
- Click and drag one of your clips so that its starting point lines up with the end of the other. You can now move your clip onto the same ‘layer’ as the first. This will make it easier to connect the two clips (see Figures 73 and 74).
- Select all your clips simultaneously (press the shift key and then select each clip with your mouse) and then drag them to the start of your Timeline. This will ensure that your videos begin playing at the start of your project.
- Drag the blue arrow to the start of your sequence and press the space bar to preview the sequence.
Step Eight: Remove Unwanted Sound-tracks
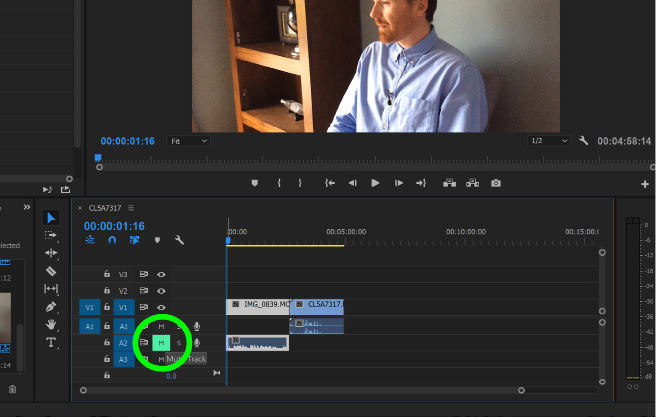
Fig. 75. The “M” button will mute all sounds on a given layer.
- In order to remove any unwanted sound (such as the sound recorded by your camera’s built-in microphone), locate the audio track on which the sound is located.
- To the left of that track click the ‘M’ icon. This audio track will now be muted — all tracks which appear on this layer will be muted.
- To delete the audio entirely, right-click the sound-track in question. This will bring up a pop-up menu. Within this menu, select ‘Unlink’. This will allow you to edit the audio and video from the original clip independently.
- Select the audio you wish to remove and press the ‘Delete’ key.
Step Nine: Add a New Sound-track
- Import your audio files into your Media Bin (see step three).
- Locate the audio file, click it, and drag it to the desired position in your Timeline (see step four).
- Shorten the track in exactly the same way that you would a video file (see step five) and place it in the desired location within your Timeline (see step six).
- Press the space bar to preview the result. Note that as your video plays, any (unmuted) audio files through which the blue bar passes will play simultaneously. This will allow you to layer sounds and create a custom soundscape.
- All audio files will play at their default volumes. To balance the audio, right-click one of the files and select ‘Audio Gain’.
- To increase the volume of the selected clip, enter a positive value (above zero).
- To decrease the volume of that clip, enter a negative value (below zero) into the ‘Audio Gain’ properties window.
- Click ‘OK’ to apply these changes.
- Press the spacebar to preview your project.
- Repeat as necessary to gain the desired effect.
- For a tutorial on syncing externally recorded audio with a video clip, please see the video lesson included in this chapter.
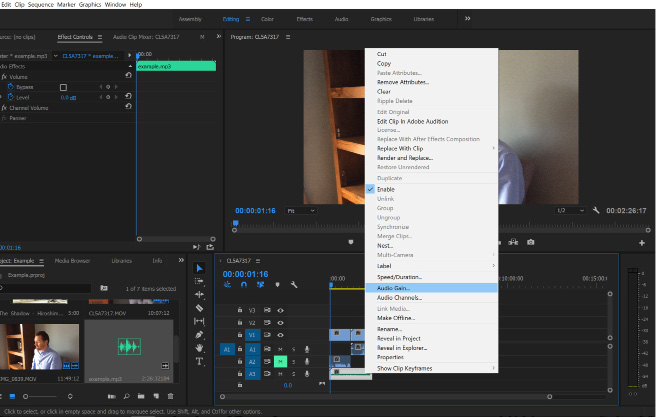
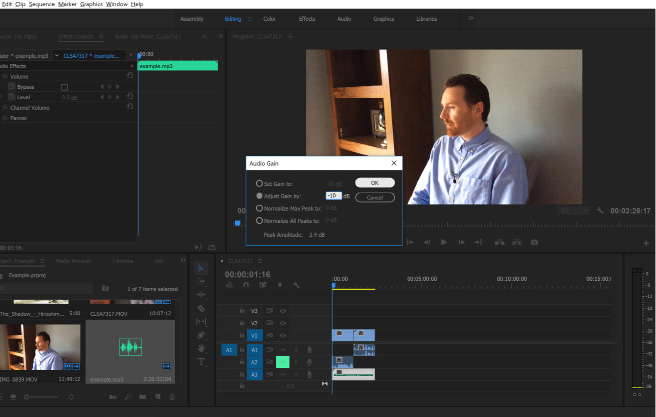
Fig. 77. Entering a negative value will reduce the default volume. Entering a positive value will increase it.
Step Ten: Add On-Screen Text
- From the toolbar, select the ‘Type Tool’.
- Move your mouse cursor into the Preview Window. Left-click over the area where you wish your text to appear.
- Left-click and enter the desired text. You can change the size, style, and font of the text by highlighting it and adjusting the desired properties located within the Effects Control Panel.
- In your Timeline, a new element will appear. This contains your text. Lengthen and shorten this element in order to control the duration for which the text will appear on screen. You can manipulate the element as you would any other visual element in your Timeline.
- Note that text will only be overlaid onto a video clip if the text element is placed on a layer above the video. Premiere Pro stacks layers so that elements that appear on the uppermost layers appear above those that are stacked below it (see Figure 80).
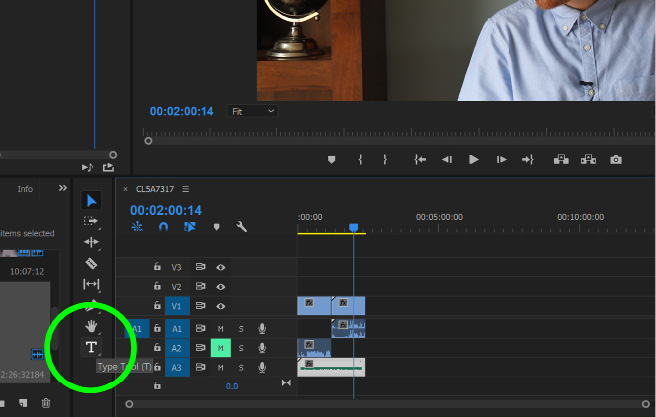
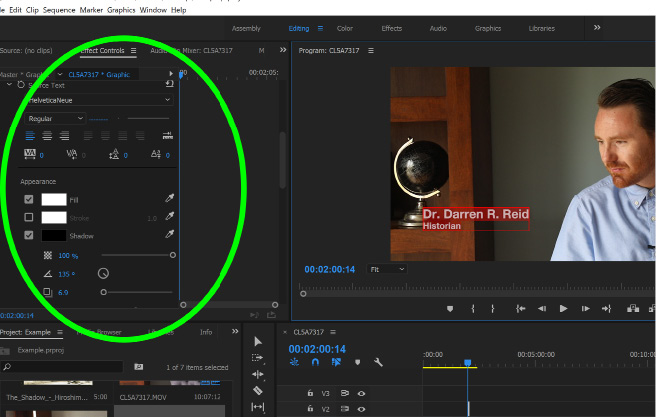
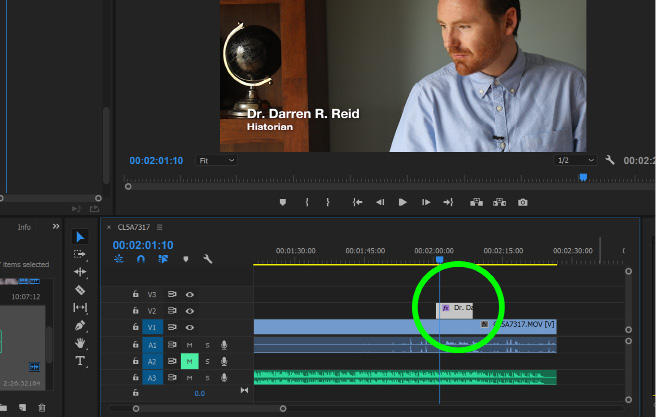
Fig. 80. The text you have created will appear in the timeline as its own discreet entity. This can be manipulated in the same way as any other visual component in your timeline.
Step Eleven: Saving Your Project
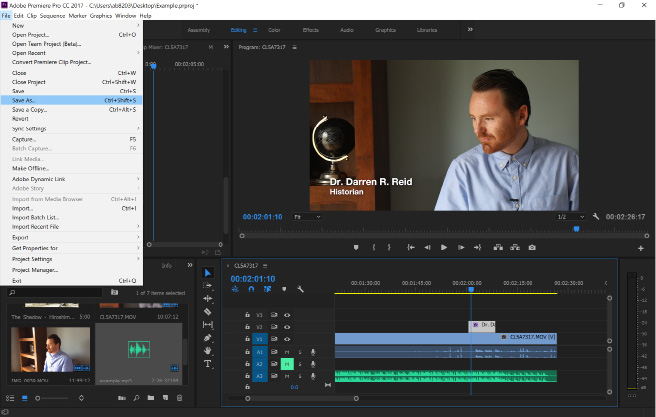
Fig. 81. Save your project regularly in order to avoid losing hours of work.
- Go to ‘File’. Select ‘Save As’.
- Select the location where you want to save your project.
- Give your file a name.
- Click ‘OK’.
- Note that the file you have created is a not a video file — the audio, video, and other elements have not yet been encoded. To create a video file that you can share you will need to ‘export’ your project.
- To open a work-in-progress project, go to ‘File’. Select ‘Open’. Select the project file you wish to resume editing and click ‘OK’.
Step Twelve: Exporting Your Project
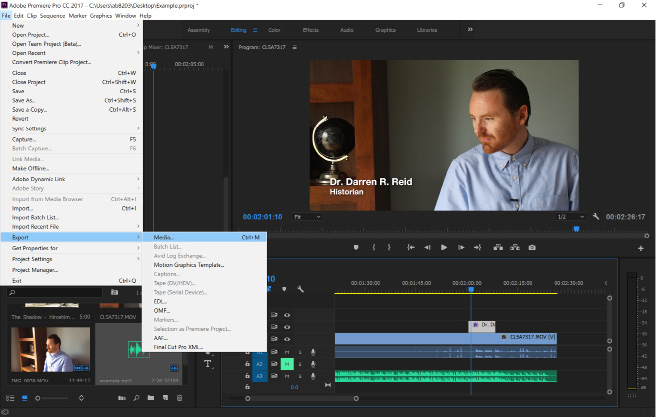
Fig. 82. Export your project to create a video file that you can share.
- Go to ‘File’. Select ‘Export’. Select ‘Media’.
- A window that open. Select your preferred file format. H.264 is a widely used video standard that will produce a high-quality video with a reasonable file size.
- Click the blue text adjacent to ‘Output Name’ and select your desired file name and the location on your computer where you wish the encoded video to be stored.
- Select the ‘Video’ tab. Scroll down within this window until you find the ‘Bitrate’ sliders.
- A bit rate of 10–20Mbs will produce a high-quality video. You can lower the bitrate to reduce the file size. This may also reduce the quality of your exported file.
- Click the ‘Export’ button. This will begin the process of encoding your project into a stand-alone video.
- Please note that, depending upon the length and complexity of your project, the exporting process can take some time to complete.
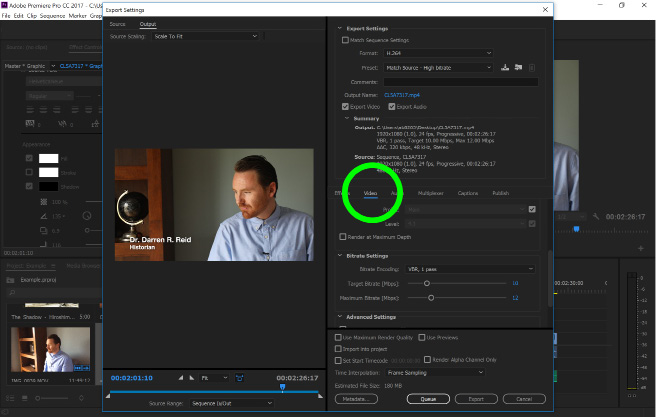
Fig. 83. Under the “Video” tab you will be able to define the settings for your exported file.
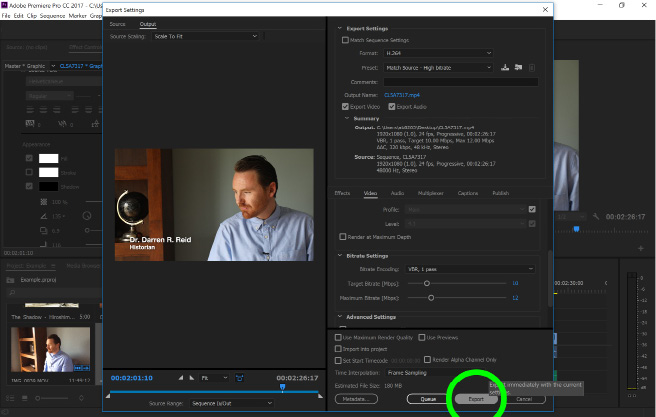
Fig. 84. Select “Export” to begin the process of turning your project into a completed video file.
Step Thirteen (Optional): Colour-Grading Your Project
Colour-grading is the process of rebalancing or stylizing the look of your film. It is an in-depth process that requires significant practice. To accomplish this, please watch the above video lesson which will walk you through the fundamentals of the process using Adobe After Effects.